Defenders of Cliffgarde

Hello everyone.

In my absence here on the blog, I have spent my time creating a board game from scratch. I did all the artwork, all the rules, all the logistics. It is now finished and ready for purchase. You build a game board by randomly placing floor tiles, then you stock it with random monsters. You choose a hero, and trek through the village, slaying villains. You collect some gold, which you can later use to upgrade your supplies.

Defenders of Cliffgarde pieces

hero card

equipment card

I would love it if you checked it out. Here is the purchase link:

https://www.thegamecrafter.com/games/defenders-of-cliffgarde

space pistol

I wanted to build a space sci fi type pistol by modifying store bought guns. So, I went to the thrift store and found these two plastic guns.

two thrift store pistols

two thrift store pistols

They were a few dollars each.

3 dollars

3 dollars

I cut them apart using a dremel tool and a scroll saw.

handle

handle

I cut off the old handle of the black pistol and cut the orange handle to fit.

I also cut off the top of the orange pistol and cemented it to the top.

top added

top added

I used two part epoxy cement to attach the parts, and auto body filler (Bondo) to patch the seams. I sanded the bondo with the dremel tool. Once it was pretty well done, I primed the whole thing with red primer then black spray paint.

primed

primed

Then with a brush, I painted each section. I kept my palette to four colors.

finished

finished

Go ahead, board the space cruiser and blast away your enemies, have some fun.

rusty battleaxe

I needed a large double-bladed battleaxe, because well, who doesn’t?

So, I began by finding an image of a steel battleaxe from Skyrim game online. I drew out the design on mdf. I drew the celtic knotwork on thin MDF (1/8″) and cut it out with the scroll saw. I routed a depression in the thick MDF (3/4″) for the knotwork to fit into.

design

design

This gives crisper details than trying to rout out the design. I stacked four layers of the 1/8″ thick MDF together and cut them all at once.

finished head

finished head

I didn’t take many photos. I didn’t plan on blogging this project. I just went out to make something. So, the finished head is above. The steps were:

draw design on paper

stack four pieces of 1/8″ MDF on top of each other and tape the edges

cut out the knotwork all at once with a scrollsaw

rout 4 depressions in the thick MDF (3/4″) for knotwork to fit into

Glue the raised piece of knotwork in place.

Cut the shape of the blade out and sand down the edges to sharpen the blade.

This is where I realized I screwed up.

I had to put the handle in but now had a finished head. Thought about it a lot and ended up cutting the part of the design off, routing a deep groove for the handle to sit in and then had to rebuild the design. Lesson learned, start with the handle and build up around it.

backside

backside

That is the backside. The black paint was already there. The MDF was salvaged from another project.

thickness

thickness

That image above shows the thickness before I sharpened it.

handle added

handle added

In the above image you can see where I had to cut the black head and rout a groove for the handle. The handle was two pieces of flat pine wood that I shaped to be round with wood rasps and sanders.

IMG_6760

I added some patch and tons of sanding.

finished

finished

I added tons of rusty paint colors to the blade, and a leather wrap for the handle. To age the leather, I dripped black paint on it, sanded it, and rubbed it down with motor oil. Then I rubbed dirt on it and sawdust all over it.

troll hunter

troll hunter

Ready for troll hunting.

Spider!!!!

Spider!!!!

Or spiders.

Go ahead, make a mess, craft a rusty battleaxe, have some fun.

Set tear down

When you have very little space to create, you need to learn how to make a project then break it down and move on to the next one. Today I took down the miniature castle set.

first piece

first piece

It is like the Buddhist monks that do those incredibly detailed chalk drawings and then blow them away when they are finished. Art needs to be created, and sometimes it needs to quickly be destroyed so you can move on to the next project.

removing towers

removing towers

Not all art is permanent.

walls

walls

If you have a huge farm, and tons of space then make all the permanent art you wish. And invite me over sometime. But for the rest of us, you have to learn to let it go.

towers

towers

I will save the towers for a future project maybe. But all the bulky styrofoam gets thrown away.

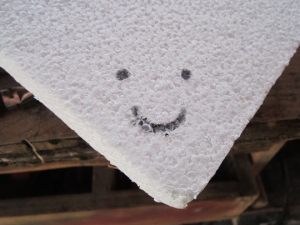
blank canvas

blank canvas

There you go, an empty workbench again which to me is a blank canvas. Now I have unlimited potential again.

Now the question is “what next?”

Hmmm, maybe a dual bladed battle axe?

Go ahead, make something cool, then tear it down and make something else.

Finally finished miniature castle set

I took some photos of the miniature castle set the other night. I took some in the daylight but got too much white glare. So, I took some at night but it was too dark. Then I found a yellow light bulb and took some more.

raw image

raw image

So, it looks great. Yay. You can use flashlights and household lights to light your scene. Take tons of photos from a bunch of different angles. The more you build in real life, the better it looks and the easier it is put together. But it is easy to fix things left undone in photoshop. You can see in my image I left plenty of background rubbish. If I am just going to use a still image and not video then this is a really easy fix. I put the raw image in photoshop and erase out all the garbage areas. I fill it in with bright green.

cleaned up

cleaned up

It took about 15 minutes or so, no big deal for a single frame.

Now I found some images online, keyed out the green with the magic wand, and filled in the background with some rocky cliff pictures.

final image

final image

Match the lighting the best you can and you now have a workable background. Just film your heroes in front of the greenscreen, then add them walking across that bridge. Or film your dragon puppet flying around, then greenscreen him right on top of this background image.

The more you can fabricate, the more realistic it will be. But eventually you reach a point where you are bored, or out of money and decide to stop. This is where your photoshop skills will come in to play.

Here are a few more images.

waiting for a dragon

waiting for a dragon

Even though the ground is missing, the other tower is perfect perspective and has perfect shadows and highlights because it really exists.

stairs

stairs

That image is untouched. You can see the yellow hue from the yellow bulb I am holding while I photograph it.

intercut

intercut

With a real model, you can shoot many different angles and intercut them with the main image. Heroes cross the bridge, dragon flys overhead, we cut to the shot as the dragon flys through the arches.

I uploaded the entire set of photos to my facebook album. You can see all the images here:

https://www.facebook.com/john.t.hankins/media_set?set=a.10206812647025371.1073741977.1551826874&type=1

I give you permission to use these images in your film if you would like. I would love to see what you create.

Go ahead, make a miniature castle set, have some fun.

stairs

Dear wife saw the guard tower, and asked “how does the guard get down there?”

So, I had to make some stairs down to it.

stairs

stairs

I cut two “stringers” which are the side supports just like real stairs are cut. Then I placed tiny treads in place with glue. I had to place a few, let them dry, then place some more.

None of this is necessary of course, but when you have the skills and tools, why not add it.

ready for install

ready for install

I had to cut part of the cliff face back to install the stairs. I tried to imagine a tiny dwarf rock cutter out there with his tiny hammer. Everything in your tiny world has to make sense.

in place

in place

Once they were in place, I needed some supports under neath.

supports

supports

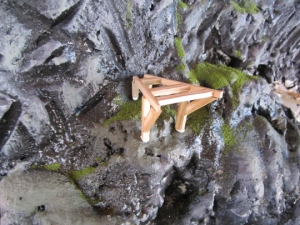
Once this was all in, I noticed a nice place for a deck, to the left of the tower. So I constructed the supports and bracing like a real deck would have. I made this first off to the side.

deck support

deck support

That image above shows the support, upside down, with the legs sticking upwards. It had to dry flat before I installed it.

deck framing

deck framing

There is the deck framing in place on the mountain. The stairs can barely be seen on the right side.

decking

decking

Once the frame was in place, I added tiny little decking boards. Try to keep everything in the correct scale. Keep referring back to your miniature figure. The boards are extra long here. They will be cut to proper length later after the glue dries, with a dremel tool.

steps

steps

At the bottom of the stairs, some steps needed to be cut into the rocks so the guard could reach the actual tower. They are cut into the rock, and then a wood slat added on top. All that white will be painted. Most of that white is painter’s caulking to patch holes.

another tip

another tip

Another tip for you is use a little bit of the gravel material directly in your paint. Put a blob of paint on your palette, and sprinkle some gravel medium in it. Stir well. Then dab this mixture on your set where you need small rocks or texture. The paint colors the gravel, but also will glue it in place.

Go ahead, start having fun with your set.

miniature castle part 8 I think

I added another tower on the side of the cliff.

tower

tower

It is just wood pieces. It was installed then patched with caulking where it joined the cliff face.

Let’s take a little side trip here for a moment. Here is a little tip for you. You can make natural rock textures in styrofoam with a heat source, either torch or heat gun. Here is the brand new piece.

new foam

new foam

Now watch as I carefully wave over the surface with a micro butane torch.

torch

torch

The foam melts and leaves a pretty rough rock like texture. Go slow because the foam is very quick to react. Don’t breathe in these fumes because they are bad, not the smell, but probably not good to breathe in.

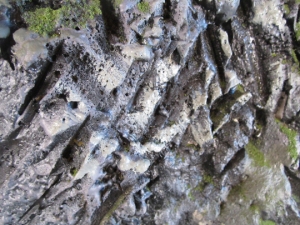
final texture

final texture

The above image is what it looks with just the torch. It really takes away the flat styrofoam feel and look. This a great technique, just go slow, and be safe. Don’t catch things on fire, and beware the fumes.

Here is another little note for you. Things don’t have to be perfect for you to create. You don’t need the perfect tools, or perfect parts, or perfect work station. The image below is my paint palette. It is a piece of scrap plasticard. The paint is some craft paint that I found on sale for less than a dollar each.

perfect

perfect

I have met artists before that require everything to be perfect for them to create. I think to this day they are still waiting.

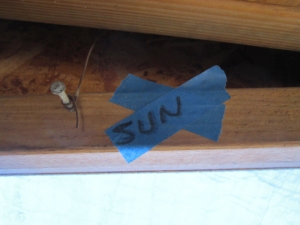
Anyway, back to the project. Did I ever mention that I have a sun? Yes, I place tape on the wall so I know where the sun is in relation to my set. That way, I always know where to paint the highlights and shadows.

the sun

the sun

highlights

highlights

That is another round of lighter gray paint on the highlight areas.

Go ahead, be perfect, and wait forever, or just get messy and get some art created.

Miniature landscaping

At the hobby store they sell different bits of terrain. The stuff below is used for fields, or wild flowers, or tree canopies.

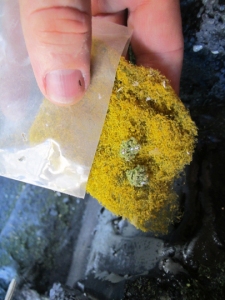
foliage

foliage

It is long and stringy like cotton. Dab your glue and water mixture on the landscape and press a small tuft of this stuff in place. Shape and manipulate with a toothpick or sculpting tool.

small tuft

small tuft

It can be pulled really thin and sparse or left in heavy clumps.

sparse

sparse

That is how it can look very sparsely placed.

several patches

several patches

The color breaks up the patches of green. You can find lots of different colors. The more you use the more realistic it can look if you do it correctly.

patterns

patterns

In your mind, figure out what kind of plant you want this to simulate. Decide what kind of growing conditions it would need. For instance, let’s assume this is a yellow plant that needs full sun and some water to survive. Now you can look around your set for places that these conditions exist and place your plants there.

imagine

imagine

As you plant your landscape, imagine where water would collect, where runoff would come down the mountain, where seeds would collect, etc. It doesn’t matter what rules you follow, just be consistent throughout your project.

The whole goal here is to convince the brain that this is real somewhere and not painted styrofoam. The mind starts off filled with disbelief that it is real. We are trying to “suspend the disbelief”. We are trying to convince the viewer’s brain to let go of some of that disbelief.

We can see a whole scene and we can believe it is real. But if we notice something that is not right, or doesn’t follow the rules, then we immediately fill our brains with disbelief, and the illusion is ruined. For example, if the entire set is filled with yellow plants that live in the sunny areas, then in one spot we find them in dark shade, that might be enough to cause us to not believe any more.

You won’t ever get it perfect, but if you make some rules, and stick with them you will have a much better chance to fool your viewers.

Go ahead, plant some sunny yellow flowers, make a mess, have some fun.

miniature castle set part 7

Let’s take another look at realistic planting of the grass.

wow magic

wow magic

See that image? Cool huh? I decided to plant the grass on the flat areas. The steep rock areas won’t hold dirt. Without dirt the grass won’t catch. You can see a few areas down the cliff face that some lucky patches of grass grabbed hold. This is already probably film ready for a quick fly by locator shot. It is just some foam, painted black, drybrushed gray, and red. Then a few sprinkles of green grass. I still have multiple layers left to go but already the magic is showing through.

another angle

another angle

With practical models like this, the shadows and highlights are always perfect. There is no way to screw them up. Real light hits it and you get real shadows and highlights with no work.

cliff face

cliff face

A few flat areas down the cliff face collected some dirt, and some grass began to grow.

wide shot

wide shot

Keep taking some photos to see how things look in your camera. See how the cliffs look great but the bridge is one block of color? We will have to work on that.

entrance

entrance

Next we will add some other plants.

Go ahead, build your own set, have some fun

miniature castle set part 6

So by now most of the drybrushing paint has been applied. Now for some fun stuff.

The hobby store/train store sells terrain elements from a company called Woodland Scenics. They are jars of grass, bushes, trees, gravel, etc.

This is a fine grass medium.

fine grass

fine grass

Grab some white glue, throw a blob in a dish and add some water. Stir until the glue dissolves.

tacky glue

tacky glue

I have used tacky glue, and also Elmer’s glue. You need something that dries clear and will dissolve in water.

Elmer's

Elmer’s

You can make it thick or make it thin depending on where you are going to apply it.

glue water mix

glue water mix

I use a brush to dab it on.

dabbing glue

dabbing glue

Then I sprinkle some green grass particles.

sprinkle

sprinkle

The particles will stick to the glue. Any excess glue will dry clear. You can always go back and add more later.

magic

magic

See ? magic grass patch. They sell different colors and textures. Remember to only add glue where you want grass to be. Grass grows on pretty horizontal areas. If you have a rock that is super steep, grass or plants are not as likely to land there and grow. In the steep areas, you can leave bare rock showing through.

example

example

If you don’t have access to the Woodland Scenics products you can make your own. The above photo is sawdust that was thrown in a bucket with some green paint. Stir it all around, then set it out to dry. You can even microwave it in small time chunks to help dry it out, or place in a shallow pan in the sun. Once dry, store in an airtight container.
black gravel

black gravel

They also sell black and white gravel. I will add some black gravel in the same manner. A little tip for you: if you add a few drops of dishwashing detergent to the glue/water mix it will cut the surface tension and allow the glue mixture to sink quicker into the grass. You can also put your watery glue mixture in a spray bottle and spray it on. You can even spray lightly over existing grass to help seal in any loose bits later.

growing vegetation

growing vegetation

See the magic yet? Take it slowly and be precise with your vegetation planting. Make sure it makes sense where you place it. If you decide your vegetation needs water then place it where the landscape would receive water if it was real.

grass

grass

Now this looks good enough already to start filming. But the more layers you add the more realistic it will be. It is up to you to determine how many layers of different vegetation you desire.

Go ahead, play landscaper, have some fun.