I have been working for the past few days on a new armature for a new puppet. I have no idea what the final puppet is going to be, I just wanted to work on my armature skills.
The final armature feels really nice, it is still not professional quality but it does feel good when you move the joints.
I used stainless steel 302 balls and rods. The plates are aluminum. Remember when working on your armature that hobbyists can not solder aluminum. Anything that needs solder has to be steel, or brass. The aluminum plates are easy to form and cut and look like the stainless steel parts to make the whole armature a silver color.
Here is a list of parts and tools I used. For cutting the aluminum, I used my bandsaw, but you can use a hacksaw or dremel tool. I shaped it with a variety of files and a few different grits of sandpaper. This is what the mostly finished armature looks like.
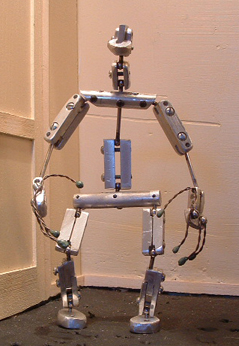
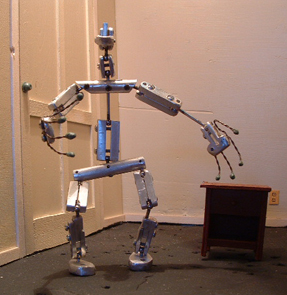
This is the head. The piece sticking out is the bottom jaw. It can move up and down.
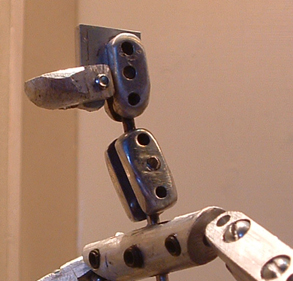
From this side you can see the screw that goes through the bottom jaw, through the middle spacer, then into the threaded part of the other side.
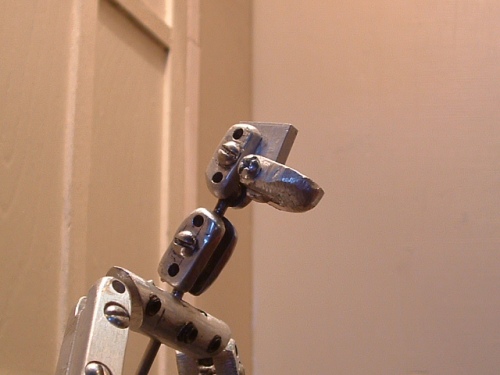
I really wanted the head to have great movement. I put a joint near the collar bone area, then one inside the skull area. There are actually three movable points there from the neck up and into the head. I was only striving for two. I could have locked down the middle one if i wanted.
I cut the shoulders at a 45 degree angle to help give the arms more range of motion. The shoulder joint rods are held into the chest block with allen wrench set screws. The holes are tapped with 8-32 threads, and the allen screws are ground down until they fit without too much sticking out.
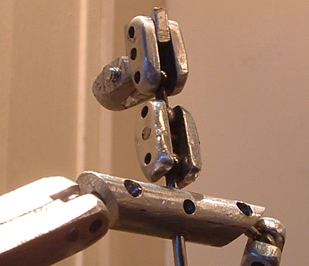
In this shot you can see the upper arms are open ball and socket as well as the lower spine. The screws are 4-40 threads and are countersunk into the plates to help reduce thickness. The spine rod goes all the way through the chest block upto the neck joint. It is held in place with an allen screw. The upper legs are also regular open ball and socket joints. The rods are 3/32″ stainless steel 302.
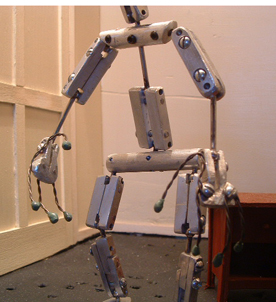
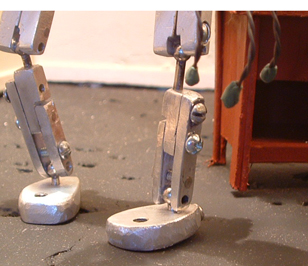
The lower legs have a step joint so it ends up with a ball on one end, and the open plates on the other end. The rod is held in the plate with a set screw. i had to go back and add the extra screw to keep the plates all lined up. In the lower leg joints the top screw holds the rod in place, the lower screw holds the three plates together. The lowest screw puts tension on the ankle ball. I used to put a joint in the toe, but usually it gets in the way as I animate so I put a solid foot in this armature.
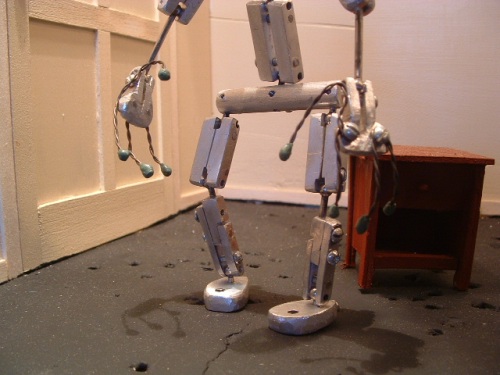
The feet are cut from a solid piece of aluminum, The rod is held in place with a screw coming in from the back of the foot. The hole is a tapped hole with 8-32 threads for the tiedown. The aluminum is 1/4″ thick from flat stock.
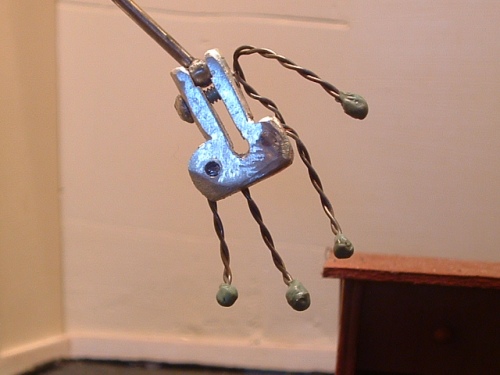
This hand design is my version of a hand I saw in one of Tom Brierton’s designs. It is cut from a solid single piece of aluminum. I cut a rectangle first to size, drilled all my holes and tapped the holes while it still had square flat edges. Once all the holes were done, then I filed it down to size. The two screws have the finger wires wrapped around and then tightened down to hold them in place. I could not figure out a better way to lock down the thumb wire since it has to emerge so far down close to the wrist. I will make sure it is secure before putting skin on it. I put green stuff on the finger tips to give them shape and to cover up the sharp metal edges. The slot cut down the hand from the wrist gives it enough flex that the screw can pull the plates together enough to lock down on the wrist joint ball. It is tricky to get all this to work. This is the top of the hand.
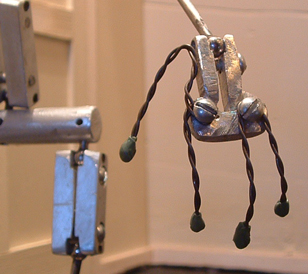
This is the palm side.
I welcome all comments.
Go ahead, make a mess, have some fun.


That armature looks fantastic! It looks very sturdy – I like the chunky aluminium plates.
Purely hypothetical, but how much would you charge to make a custom armature like that ?
LikeLike
I agree it’s really cool. I’ve just started out with stop motion myself. Don’t know where it’s going. Atm I’m just strugling to make an armature. I would love it if you could check it out at puppettale.com and maby give me some tips or feedback.
LikeLike
Fantastic job! Looks great to me.
LikeLike
Looking great! I have also seen the test video you posted on stopmotionanimation.com you shot before completing the armature. It was a very smooth dancing.
Hands… great idea to shape the hand connected with a ball joint. I wil try the same for my armature. For fingers, why didnt you just drill holes into the aliminum hand block and had the wires going?
LikeLike
WOW!
Excellent work man!
such uncharted waters for us over here….but man….so cool to see .
jriggity
LikeLike
Like I said on youtube, I love it!
—HA! now I know why you were doubting to see whether there would be a prize this month, who would NOT want to keep that home 😀
Well , just dropping by. I am in blogger , just to let you know. I am moving here , temporarily..til my main site works out at summer possibly.
Dan Mmc/
LikeLike
That looks awesome. How do you think the aluminum will hold up on that small of a scale? Do you for see any problems with it? I have seen ’em made of brass which is a soft metal, but not aluminum.
LikeLike
how much did it cost
LikeLike
very little frank, it is just a few pieces of aluminum from the hardware store. Probably less than $20
LikeLike